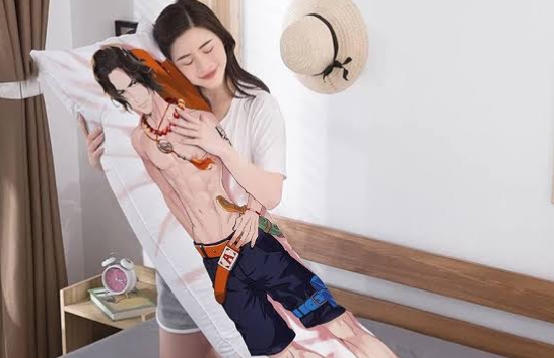
Dakimakura, also known as body pillows or hug pillows, are popular in Japanese culture and have gained a following worldwide. These large pillows often feature anime characters, idols, or other designs on them, making them both comfortable and a form of self-expression for fans. While you can buy dakimakura with your favorite characters already printed on them, creating your own can be a fun and rewarding DIY project. In this comprehensive guide, we’ll provide you with tips and inspiration for making your very own custom dakimakura.
Table of Contents
Materials Needed
Before you start creating your dakimakura, you’ll need to gather some materials. Here’s a list of what you’ll need:
1. Fabric
Choose a soft and durable fabric for your dakimakura. Most people use two-way tricot fabric for its stretchiness and smooth texture, but you can also use other materials like peach skin or velvet.
2. Pillow Insert
You’ll need a pillow insert to stuff your dakimakura. The size of the insert will depend on the dimensions of your dakimakura cover.
3. Fabric Markers or Paint
If you’re planning to hand-draw or paint your design onto the fabric, you’ll need fabric-safe markers or paints.
4. Sewing Machine and Thread
To sew your dakimakura cover, you’ll need a sewing machine and matching thread.
5. Scissors
A good pair of fabric scissors will be essential for cutting out your fabric pieces.
6. Pins
Pins will help you keep your fabric pieces in place while sewing.
7. Design Inspiration
Whether it’s a favorite anime character, original artwork, or a photo collage, you’ll need a design to transfer onto your dakimakura.
Steps to Create Your Own Dakimakura
1. Design Your Dakimakura
Use software like Photoshop or Illustrator to create a digital design of your dakimakura. Make sure to consider the dimensions of your pillow insert and leave extra space for seam allowances.
2. Transfer Your Design
Once you have your design ready, you’ll need to transfer it onto your fabric. You can do this by printing the design onto transfer paper and then ironing it onto your fabric, or by using a projector to trace the design directly onto the fabric.
3. Cut Out Your Fabric
Use your fabric scissors to cut out the front and back panels of your dakimakura cover, making sure to leave seam allowances around the edges.
4. Sew the Panels Together
Place the front and back panels of your dakimakura cover right sides together and pin them in place. Using a straight stitch, sew around the edges, leaving a small opening to insert the pillow insert.
5. Insert the Pillow
Once you’ve sewn around the edges, turn your dakimakura cover right side out and insert the pillow insert. Then, hand stitch the opening closed.
6. Add Finishing Touches
If you’d like, you can add extra details to your dakimakura, such as decorative stitching or fabric paint accents.
7. Enjoy Your Custom Dakimakura
Once you’ve finished, you can enjoy your custom dakimakura and show off your creativity to your friends and fellow fans.
Tips for a Successful DIY Dakimakura
– Use high-quality fabric that’s soft to the touch and comfortable to sleep on.
– Wash and iron your fabric before starting to prevent shrinkage.
– Take your time with the sewing to ensure neat and straight seams.
– Test your fabric markers or paints on a scrap piece of fabric before using them on your dakimakura.
– Consider adding a zipper or buttons to your dakimakura cover for easy removal and washing.
Inspiration for Your Custom Dakimakura
Favorite Characters
Whether it’s from an anime, manga, video game, or other media, featuring your favorite character on your dakimakura can be a great way to show your fandom.
Original Artwork
If you’re artistically inclined, consider creating your own original artwork to feature on your dakimakura.
Photo Collage
Create a collage of photos of friends, family, or pets to make your dakimakura truly unique.
Quotes or Lyrics
Feature your favorite quotes or song lyrics on your dakimakura for a personal touch.
In conclusion, creating your own dakimakura can be a fun and rewarding DIY project that allows you to express your creativity and fandom. With the right materials and a bit of creativity, you can make a custom dakimakura that’s uniquely yours. So, gather your materials, choose your design, and start sewing your very own custom dakimakura today!

